Do you struggle with center time in your early child special education classroom? Does it feel like chaos just erupts at that time of day?
Or maybe you have a system in place but are looking to fine-tune it.
In this blog post, I will share how I ran center time in my special education preschool classroom, the resources I used, and how I made it a learning experience. You can also see a video walkthrough HERE.
What is Center Time?
Center time, interest areas, free play, or whatever you may call it, is a designated time in the school for students to explore, play, and socialize in a controlled setting.
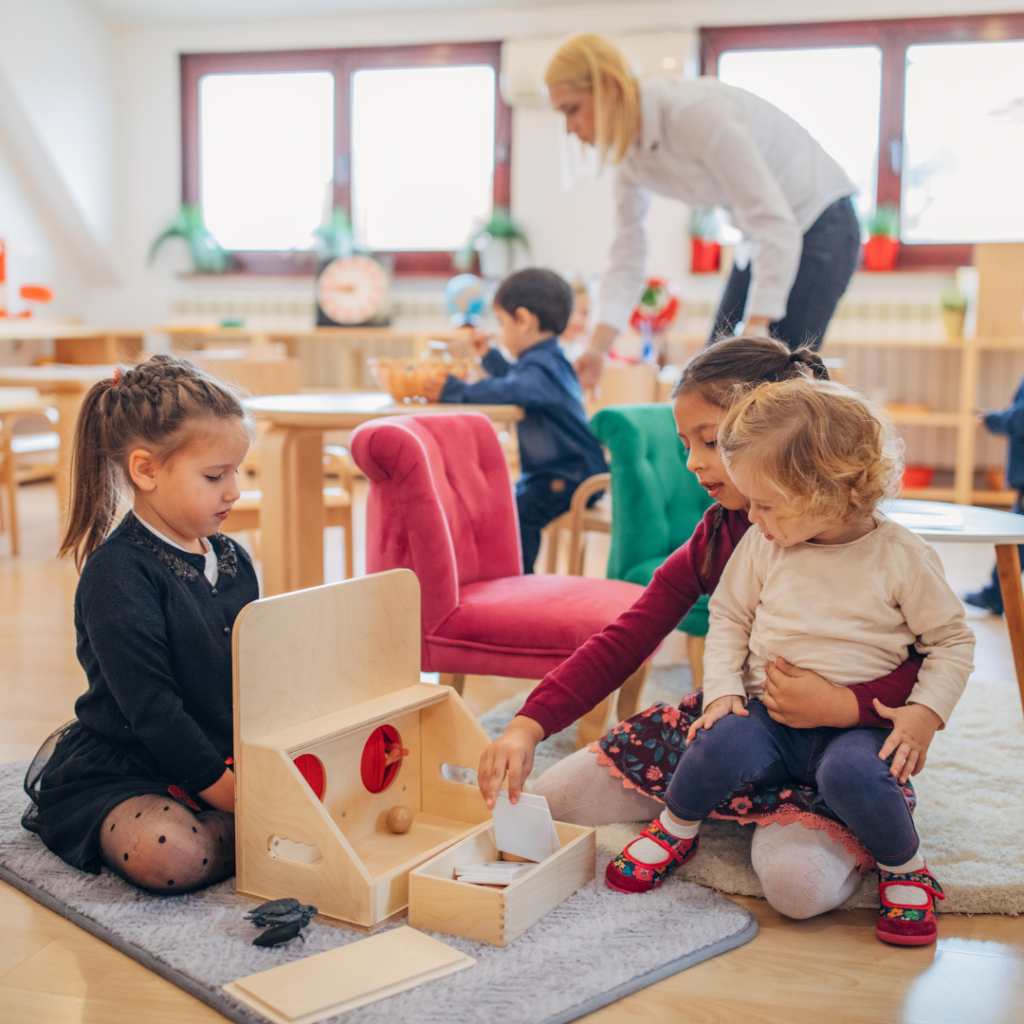
This is probably one of the most important parts of any early childhood education classroom. Students are able to learn naturally through play, either independently, with a classmate, or with a teacher.
Center time may look different in each individual classroom, but the general concept is that there are designated areas or “centers” where students can play and learn.
The most common centers are art, writing, reading, dramatic play (also called housekeeping or home living), science, math, sensory tables, and blocks. You may also see a light table, computers, music, toys and games, puzzles, trains, and gross motor.
How Do I Set Up Centers?
The key to setting up individual centers is creating a defined space. This can be done by using furniture to create a perimeter or painter’s tape on the floor to indicate the center’s boundaries.
Within that center, you can find corresponding materials, labels, and visuals. You want an outsider to be able to walk into the room and instantly be able to point out where any given center is.
Make sure your centers are labeled with what they actually are! Art should have a sign that says art, etc.
When we make centers a defined space, it creates structure and predictability, which is imperative for our neurodivergent learners.
This can be tricky to do and feel like a game of Tetris. This is especially true for smaller classrooms.
Sometimes, it’s unavoidable, and you may have to combine two centers. Just make sure the ones you are combining make sense. You wouldn’t combine art with cars, but you may combine cars with blocks.
Do not be afraid to play around with it a little. Just like making a schedule, it is a lot of trial and error until you get it right.
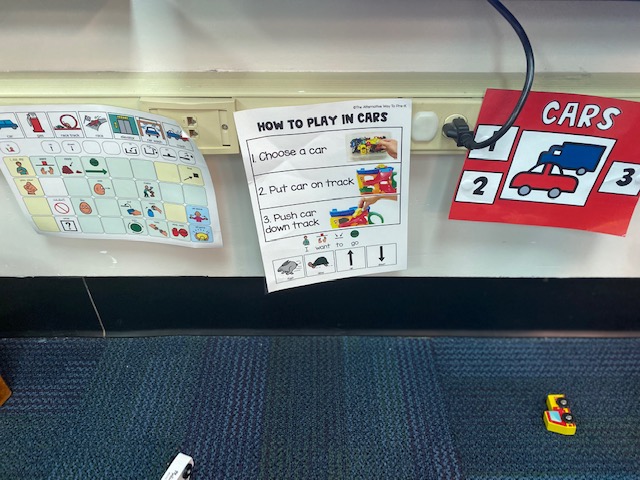
In addition to the physical structure of each center, within every center, I have these three things; a center sign-in board, a corresponding core board with fringe, and visual suggestions on how to play in that center (don’t worry if the kids do play with the materials “appropriately” but we will get into that later).
These three things help facilitate play in each center and reinforce the defined space concept. You can click each individual link for each resource or find them all bundled here.
Pro Tip: If your center is on a shelf or you find students accessing it during non-center time, add a shelf cover to help deter students from playing with materials not in use. It creates a visual cue that the center is closed. Learn how to make them in this video.
How Do I Implement Centers?
Now that your centers are set up it is time to implement them! It may seem scary but I promise you it is easier than you think! Do not overthink it!
Before you start introducing it to students, make sure you know what your systems are. Your systems are how your students will choose centers, transition in between them, capacity limits per center, as well as rules and expectations. It may seem overwhelming so let me break it down on how I handed each system.
Choosing Centers
When students initially choose centers, they sit in a group. Each student takes a turn using expressive language or AAC. I have an object symbol choice board and a large center fringe on my large core board (in addition to students’ individual systems) to indicate their first center choice.
As centers become full, or maybe it just isn’t an option that day, I will cover that symbol with an X or remove it. Students can choose any center they want as long as it is open. They then take their center tag and put it on the corresponding center board.


Yes, there will be students who are not at the choosing stage yet, and that is okay. For these students, I will either lead them to one they typically are interested in or let them explore on their own.
Once a student makes their choice, they will take their name tag and put it on the corresponding center sign.
This is a LOT of directions and steps for many students. Start off small if you have to, and differentiate it for each student. Some of my students would just grab their name tag and drop it, some would grab it and put it in the wrong spot, and some would carry out the whole process.
Just meet each student where they are and support them as needed.
Remember, this is the student’s choice time. I highly discourage you from assigning students to specific centers.
Transitions Throughout Centers
You may see some variation among different teachers. There is no right or wrong way, but I truly believe students need to have the option to change centers. Many times, I see teachers make students remain in the center they chose for the duration of that center time. This is their playtime. Let them play where they want to play.
With that being said, I allow students to transition to whichever center they want as long as they are cleaned up in the current one they are in and the desired center has an open spot. Students can transition by moving their name tag/picture from their current center board to a different one. Again, this process has a lot of steps, so meet students where they are. It’s okay if some students use their name to transition and others need an adult to do it but we are exposing them to the process.
Capacity limits
Capacity limits are going to vary based on class size, available materials, and room size. Since I generally only had about 13 kids max and at least 8 center options, I tried to keep it to a maximum of 4 in a center. Some centers would have less based on size. For example, my light table was small and could only accommodate two students, and our sensory corner could only hold one. 100000%, you are going to have a student who wants to go into a full center. That is a teachable moment for all parties involved. Set a timer, and when it goes off, swap the students.
Rules
Keep it simple. Hands to self, take turns, clean up, etc. This really should be carried over from your classroom expectations with the addition of how students are assigned/chosen and transition throughout centers. Make visuals and give daily reminders!
Introducing Centers to Students
At the beginning of the year, I do one of two things depending on my class size.
If I have a small class, we may only open 2-3 centers the first week. Within those centers, we teach expectations naturally in the center. We do not sit down and say, “Hey, you can do ABC but not XYZ,” in dramatic play. Instead, we go into the center with no expectations. If a student happens to try and climb in the toy sink we give the guidance then, “Not safe, feet stay on the ground.” The next week we add a few more centers until we have added them all. I like doing this way because it makes things less overwhelming for students. The centers that have not been introduced yet may even stay completely empty until we are ready to use them. During this process, we also teach students how to find their names and move them from center to center, as well as how to clean up before they can change centers.
Realistically, our numbers are rarely that low to go that route. We may have to have them all open at once. So, we guide students to choose a center or one we think they may like. We continue coaching them to get their center tags and put them on the corresponding center board.

Student Expectations
This is where I feel like people get lost or frustrated. “My student won’t stay in one center. They dump all the toys they don’t know how to play. Center time is mass chaos!”
Center time probably is going to be one of the most lax times of your day BUT it can still be structured with help from adults (we will get to that next).
The first step in figuring out student expectations is to release some control! It is not going to look perfect. Not every student is going to play “appropriately” or according to the stereotypical norm and remain in one area. That is okay!
Once you have accepted the fact that it may look chaotic, we are to make it controlled chaos. As you get to know your students, you will learn their skill sets and how far you can push them or how much support they need. You can then start differentiating student expectations
For example; You will see student A can transition independently but may need a prompt to move their name. That is their expectation for centers. Whereas student B is not quite at the choice-making stage; just likes to walk around and does not seem to want to engage in toys besides mouthing them.
Student B we would not set the expectation to move their name around. We will show it to them and model it without expectation. The same thing with toys and materials, we will model without expectation.
Play looks different for every child. Center time is not a time for us to make students conform to playing with toys in the “normal” or neurotypical way. If a student wants to play by lining up all their cars instead of putting them down the track that’s fine! Turn it into a learning opportunity. Work on taking turns lining them, color IDing, or simply just playing with shared items. There is no right or wrong way to play.
Adults’ Role During Centers
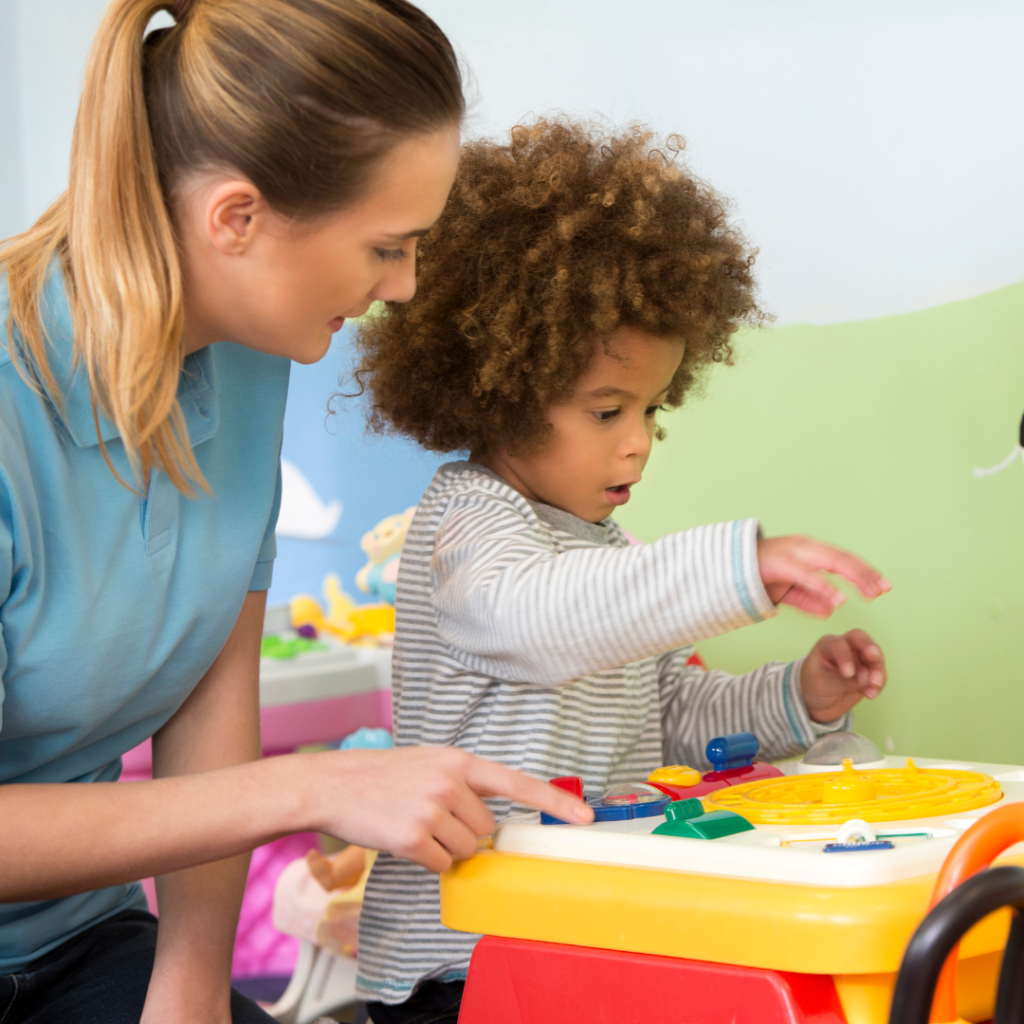
Even though this is “free time” it is still teaching time for you (and probably one of the best/natural ways to teach). All adults, this means paras and teachers, should play in parallel with students while modeling without expectation.
You may choose to move from student to student, target each student within that time, assign yourself to specific students on specific days, or just play by ear, depending on the student’s moods.
Whatever you choose to do, just make sure each student is being supported by an adult for at least ten minutes max within your 30-minute window(or whatever your center time duration is). We need to give students an opportunity to play independently.
Now what your play looks like with each student is going to vary based on their skill set.
Student A we can probably engage them in a sociodramatic skit, or count the number of cars we have, and model lots of core words.
Whereas student B may be something as simple as looking for that engagement through a game of peekaboo, copying them as they repetitively tap a toy on the ground but adding language to it, or maybe just singing a song while they listen and smile.
If you have a team member who does not know how to parallel play or is super reluctant, guide them to use the How To Play In Centers, it’s not just for students! This will give them some ideas of prompts to model without expectation and language to use.
